Photo by Jen Theodore on Unsplash
BlurHash encodes a whole photo into a few dozen characters that render instantly as a blurred preview. Here is how I encode it in Rails and decode it in Vue.js.
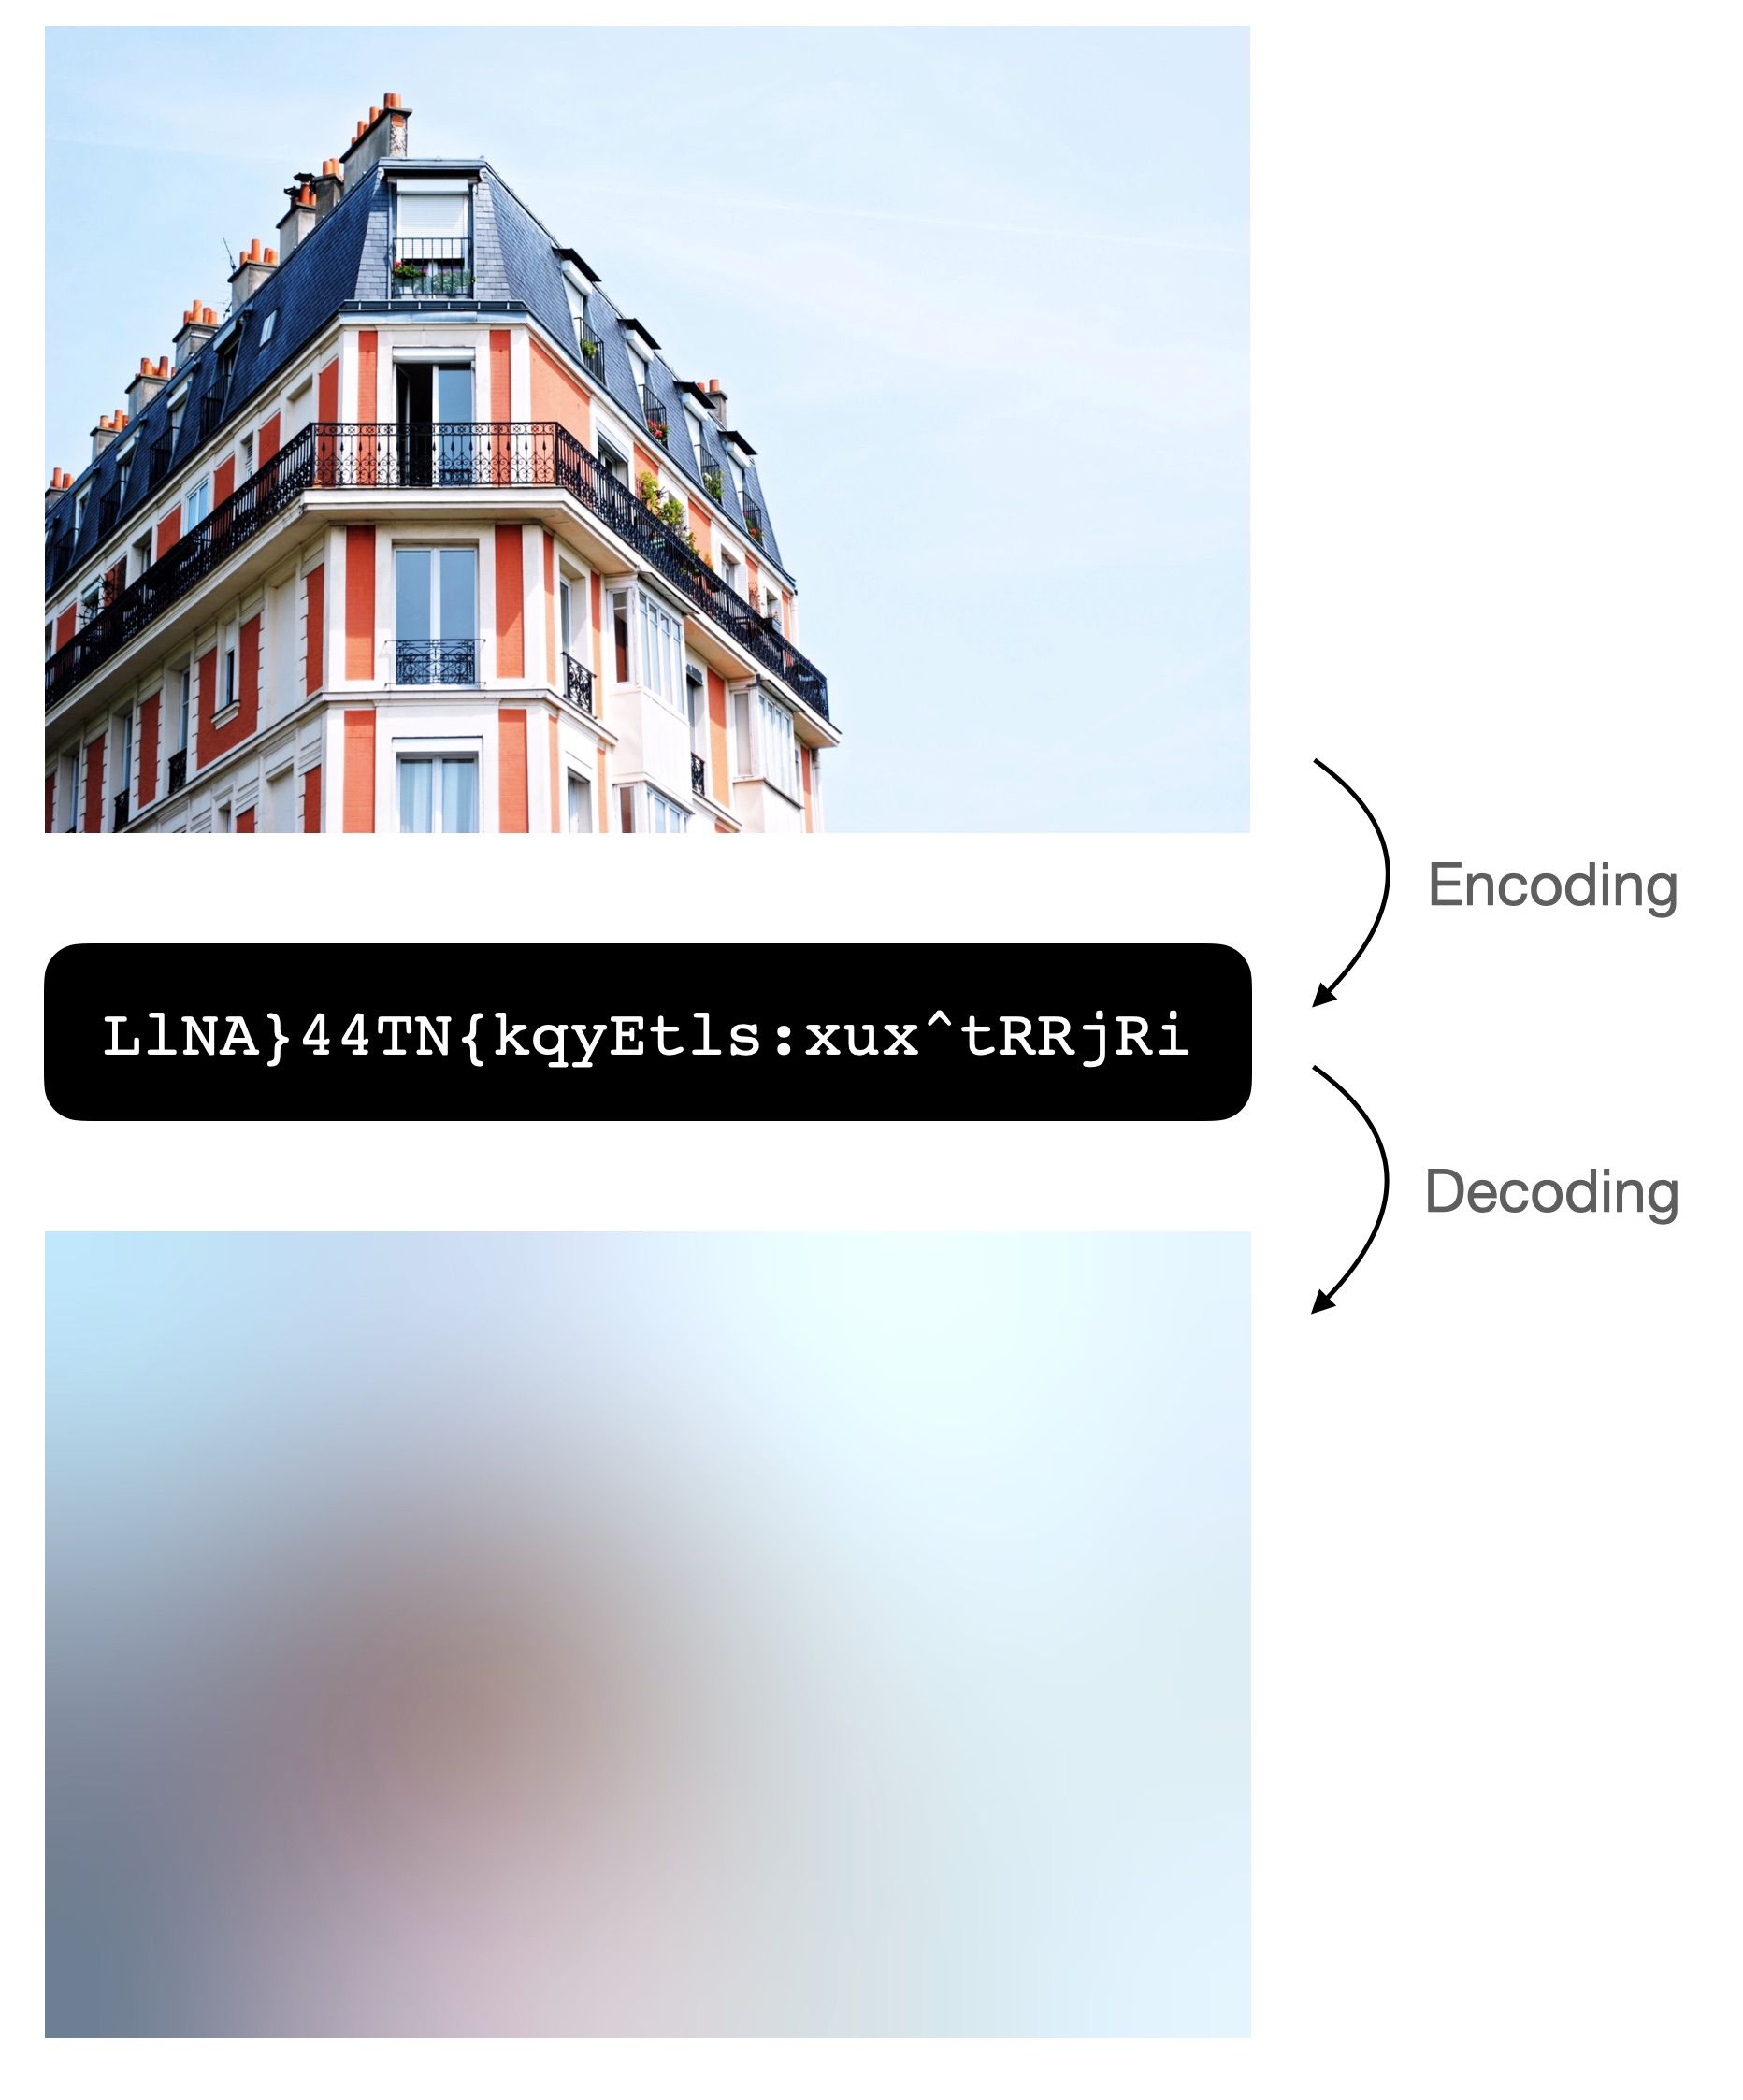
A BlurHash is a compact representation of a placeholder for an image. It can be used to display a preview while the browser is loading the entire image. In this article, I want to show how to encode the BlurHash in a Ruby on Rails application and how to use it for progressive image loading in a Vue.js frontend.
To start off, here is an example of a BlurHash string:
LlNA}44TN{kqyEtls:xux^tRRjRiBecause it’s a small string (typically about 30 chars), it can be stored inside the database right along with other image metadata like width, height, geocoding, etc.
The implementation requires two steps: First, the BlurHash string needs to be encoded from the original image and then the string representation can be decoded to draw the placeholder. It looks like this:
There are open-source libraries in several languages for both steps.
The Rails backend: Encoding the BlurHash
First, we need to add the blurhash gem to the Rails application:
bundle add blurhashIn this example, I want to use Active Storage for file storage, so extracting file metadata is done with analyzers. For images, there is a built-in analyzer which relies on MiniMagick for image processing. To keep this example simple, I’ve built a custom analyzer based on this class. For better performance, I recommend to use ruby-vips and rewrite the analyzer from scratch.
# app/analyzers/my_image_analyzer.rb

class MyImageAnalyzer < ActiveStorage::Analyzer::ImageAnalyzer
  def metadata
    read_image do |image|
      if rotated_image?(image)
        { width: image.height, height: image.width }
      else
        { width: image.width, height: image.height }
      end.merge blurhash(image)
    end
  end

  private

  def blurhash(image)
    # Create a thumbnail first, otherwise the BlurHash encoding is very slow
    thumbnail = image.resize('200x200>').auto_orient

    {
      blurhash: BlurHash.encode(
        thumbnail.width,
        thumbnail.height,
        thumbnail.get_pixels.flatten
      )
    }
  rescue MiniMagick::Invalid => e
    logger.error "Error while encoding BlurHash: #{e}"
    {}
  end
end
The new analyzer needs to be registered, which is typically done with an initializer:
# config/initializers/active_storage.rb

require 'my_image_analyzer'

Rails.application.configure do
  config.active_storage.analyzers = [
    MyImageAnalyzer,
    ActiveStorage::Analyzer::VideoAnalyzer
  ]
end
When the analyzer processes a file, it adds the BlurHash string to the file metadata, which is stored in the active_storage_blobs table of the database. Try it out:
class Post < ApplicationRecord
  has_one_attached :image
end

post = Post.create!
post.image.attach(
  io: URI.open('https://images.unsplash.com/photo-1451153378752-16ef2b36ad05'),
  filename: 'example.jpg'
)
post.image.analyze
post.image.metadata

# => {
#   identified: true,
#   width: 3872,
#   height: 2592,
#   blurhash: 'LlNA}44TN{kqyEtls:xux^tRRjRi',
#   analyzed: true
# }
That’s it for the backend. The next step is how to use the BlurHash string in the frontend.
The Vue.js frontend: Using the BlurHash as a placeholder while loading
For decoding pixels from a BlurHash string, we need to install the blurhash package:
yarn add blurhashNow we can build a simple Vue component that draws the pixels on a canvas. It takes a hash and an aspect ratio as props. To keep things performant, a minimal canvas (32 × 32 pixels) is used and resized via CSS. For styling stuff, I chose the wonderful Tailwind CSS library.
<!--
  BlurhashImg.vue
  Based on https://github.com/fpapado/blurhash-img
-->

<template>
  <div class="relative h-0" :style="`padding-bottom: ${aspectRatio * 100}%`">
    <canvas
      ref="canvas"
      class="absolute top-0 right-0 bottom-0 left-0 h-full w-full"
      width="32"
      height="32"
    />
  </div>
</template>

<script>
import { decode } from "blurhash";

export default {
  props: {
    hash: {
      type: String,
      required: true,
    },

    aspectRatio: {
      type: Number,
      default: 1,
    },
  },

  mounted() {
    const pixels = decode(this.hash, 32, 32);
    const imageData = new ImageData(pixels, 32, 32);
    const context = this.$refs.canvas.getContext("2d");
    context.putImageData(imageData, 0, 0);
  },
};
</script>
Now we can build a LazyImage component, which takes an image URL, a BlurHash string, and width & height. Via the IntersectionObserver API, it starts loading the image when it scrolls into the viewport. While loading, the BlurHash placeholder is displayed.
First, I add vue-intersect which simplifies handling the observer:
yarn add vue-intersectThis is the central part of the implementation: The <img> component comes without the src attribute, which will be added later when the image enters the viewport. With opacity transition, the placeholder is faded into the fully loaded image:
<!-- LazyImage.vue -->

<template>
  <intersect @enter.once="onEnter">
    <div class="relative">
      <!-- Show the placeholder as background -->
      <blurhash-img
        :hash="blurhash"
        :aspect-ratio="height / width"
        class="absolute top-0 left-0 transition-opacity duration-500"
        :class="isLoaded ? 'opacity-0' : 'opacity-100'"
      />

      <!-- Show the real image on the top and fade in after loading -->
      <img
        ref="image"
        :width="width"
        :height="height"
        v-bind="$attrs"
        class="absolute top-0 left-0 transition-opacity duration-500"
        :class="isLoaded ? 'opacity-100' : 'opacity-0'"
      />
    </div>
  </intersect>
</template>

<script>
import BlurhashImg from "BlurhashImg";
import Intersect from "vue-intersect";

export default {
  components: {
    Intersect,
    BlurhashImg,
  },

  inheritAttrs: false,

  props: {
    src: {
      type: String,
      required: true,
    },
    blurhash: {
      type: String,
      required: false,
      default: null,
    },
    width: {
      type: Number,
      default: 1,
    },
    height: {
      type: Number,
      default: 1,
    },
  },

  data() {
    return {
      isVisible: false,
      isLoaded: false,
    };
  },

  methods: {
    onEnter() {
      // Image is visible (means: has entered the viewport),
      // so start loading by setting the src attribute
      this.$refs.image.src = this.src;

      this.$refs.image.onload = () => {
        // Image is loaded, so start fading in
        this.isLoaded = true;
      };
    },
  },
};
</script>
Using the LazyImage component is simple:
<!-- Example.vue -->

<template>
  <lazy-image
    src="https://images.unsplash.com/photo-1451153378752-16ef2b36ad05"
    blurhash="LlNA}44TN{kqyEtls:xux^tRRjRi"
    :width="3872"
    :height="2592"
  />
</template>

<script>
import LazyImage from "LazyImage";

export default {
  components: { LazyImage },
};
</script>
More
I have pushed the full source code to a GitHub repository and created a live demo.
Changelog
- 2021-04-15: I’ve updated the frontend example to Vue.js 3 and removed the
vue-intersectlibrary. Please look at the commit in the GitHub repository for the changes.